Hello Everyone,
Unfortunately I am removing my slideshow from my blog. Recently when you click on the slideshow it sends you to another site, in which there are unsavory links/pics that you can go to, plus some of these unsavory links/pics can be put onto my blog. This is not the direction that I want to take my business to, nor do I wish to promote this type of thing. So for now I am removing my slideshow. Thank you for looking at my blog.
Marcia
Tuesday, November 21, 2006
Monday, November 13, 2006
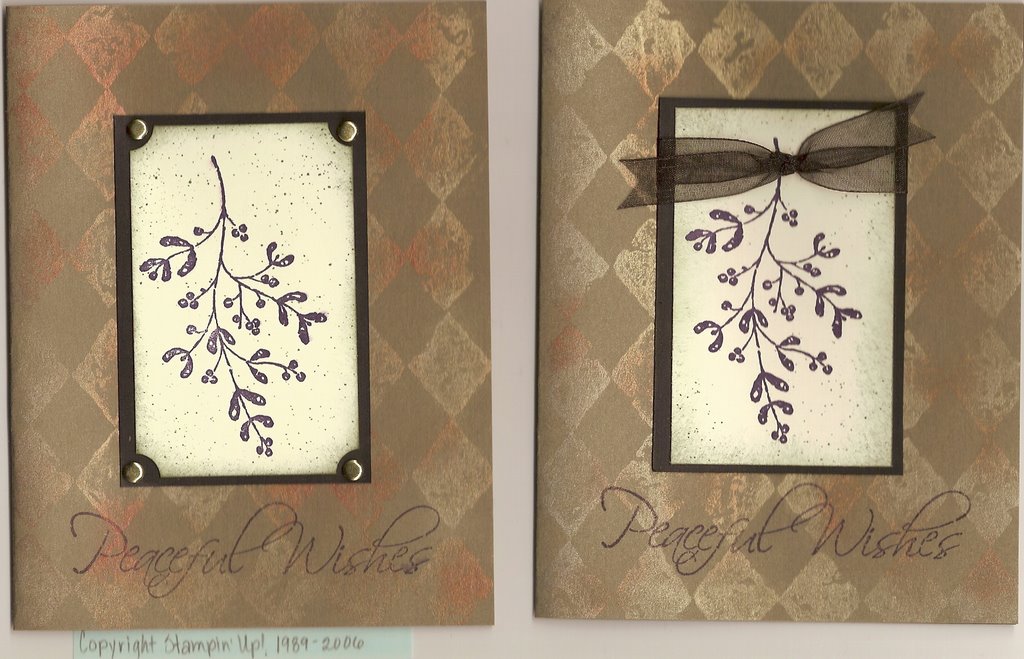 This is the other card we did at our last club night last thursday. The technique for the background is called "Poppin' Pearls". We stamped the background Print Pattern on true thyme cardstock with VersaMark Ink. Then we dipped our sponge daubers into interference gold pear ex powder and with a light touch pouced over entire stamped area, we then used a swiffer cloth to wipe away excess powder. We added a second pearl ex powder in spots randomly over top of the first powder. After using a swiffer cloth again, we then sealed with hairspray (it is important to seal the image as it will rub off if you don't - an acrylic sealer is better, but we didn't have any at the time). We then stamped our focal image on very vanilla cardstock, sponged the edged, used the color spritzer with always artichoke marker, and adhered it to the page. The ladies could either pick a ribbon or use brads to finish it off. We then stamped Peaceful Wishes in basic black classic ink on top of the background. Everyone really like the finished product when they were done. It is really shimmery in person.
 This is the tree fold card we did at our club night last thursday. Everyone used Stampin' Up! Designer Series Holiday Thyme paper and using some complicated folds, created a tree fold card. Thank you Kerry, my upline, for this great idea.
These are the instructions as given to me by Kerry. There are four squares of the designer series paper, and a small piece for the trunk. The sizes are 1 1/2", 2", 2 1/2", and 3 1/2". Using your bone folder fold the square in half into a rectangle both ways so you have what looks like 4 squares. Then fold into a triangle both ways - so it is folded in half both ways. It has now been folded in half every which way it can be folded in half. Then fold back into a rectangle - holding the paper with the fold on top, push in the sides to make a triangle. Take the two corners from the top triangle and fold them to the center fold until they meet at the crease line...then layer them on cardstock to create a tree.
Have fun!
Marcia
P.S. Thank you Kerry for the wonderful idea for this card, great instructions, and layout! Everyone enjoyed making this card. I think they are looking forward to wowing their friends and family.
Wednesday, November 01, 2006
Welcome to my BLOG!
Hello Everyone,
I am glad you decided to stop by and see my blog. Here I will have samples of my stamping projects; cardmaking, scrapbooking, gift giving, home decor and any other creative ideas that come to mind. I hope you come to visit often and leave feeling inspired.
I am glad you decided to stop by and see my blog. Here I will have samples of my stamping projects; cardmaking, scrapbooking, gift giving, home decor and any other creative ideas that come to mind. I hope you come to visit often and leave feeling inspired.
Subscribe to:
Posts (Atom)
